If you’re looking for the original octave fuzz sound, the Roger Mayer Octavia is for you. This is (I assume) the original octave fuzz; that is to say, I assume Roger Mayer was the first to make this effect.
As the name would suggest, an octave fuzz adds an octave to the sound signal while also adding fuzz. Jimi Hendrix used it a lot, and you can hear it on tracks like Purple Haze and Little Wing. Because of its association with Hendrix, the Octavia is one of those super famous pedals. Even if you don’t have or want the Roger Mayer version, a lot of people love and octave fuzz because it’s not just a fuzz, it’s an octave fuzz.
Some people think you can get the same sound by just using an ordinary fuzz pedal and an ordinary octave pedal together, but there’s something about an octave fuzz that’s just a little bit different. You can’t achieve the same sound and tone with separate pedals.
All in all, it’s a little bit different and a little bit unique. Even if you’re a Jimi Hendrix fan (aren’t we all?), and octave fuzz (and therefore the Octavia) may not be right for your personal sound. If it’s not, skip this build. Or even if it’s not, build one anyway. It’s a fun circuit to build and try to understand.
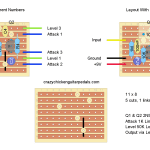
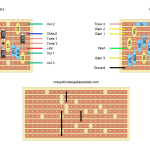
Roger Mayer Octavia Wiring Schematic
On the surface, this circuit looks pretty complex. It is complex in come ways, but also not too bad when you break it down into parts.
The first part (up to Q1) looks to be a pretty standard input buffer that will bring the signal up to strength before getting into the middle which is doing most the work: transistor clipping to make fuzz and the addition of the octave.
To be honest, understanding how this circuit is adding the octave is a bit beyond my abilities. From what I’ve read, it’s all happening after Q3 where the two diodes (one from the collector and one from the emitter of the transistor) come together. From my limited understanding, the two signals are out of phase with each other upon rejoining and then rectify into a signal that is twice the frequency of the old signal, i.e., an octave. This is imperfect, of course, so will also add a little bit of fuzz in there (although there’s already fuzz in the signal as well).
Sorry that I can’t explain in great detail how the octave is added. Looks like I need to do some research…
Here’s the wiring diagram:
Click on the schematic to enlarge it.
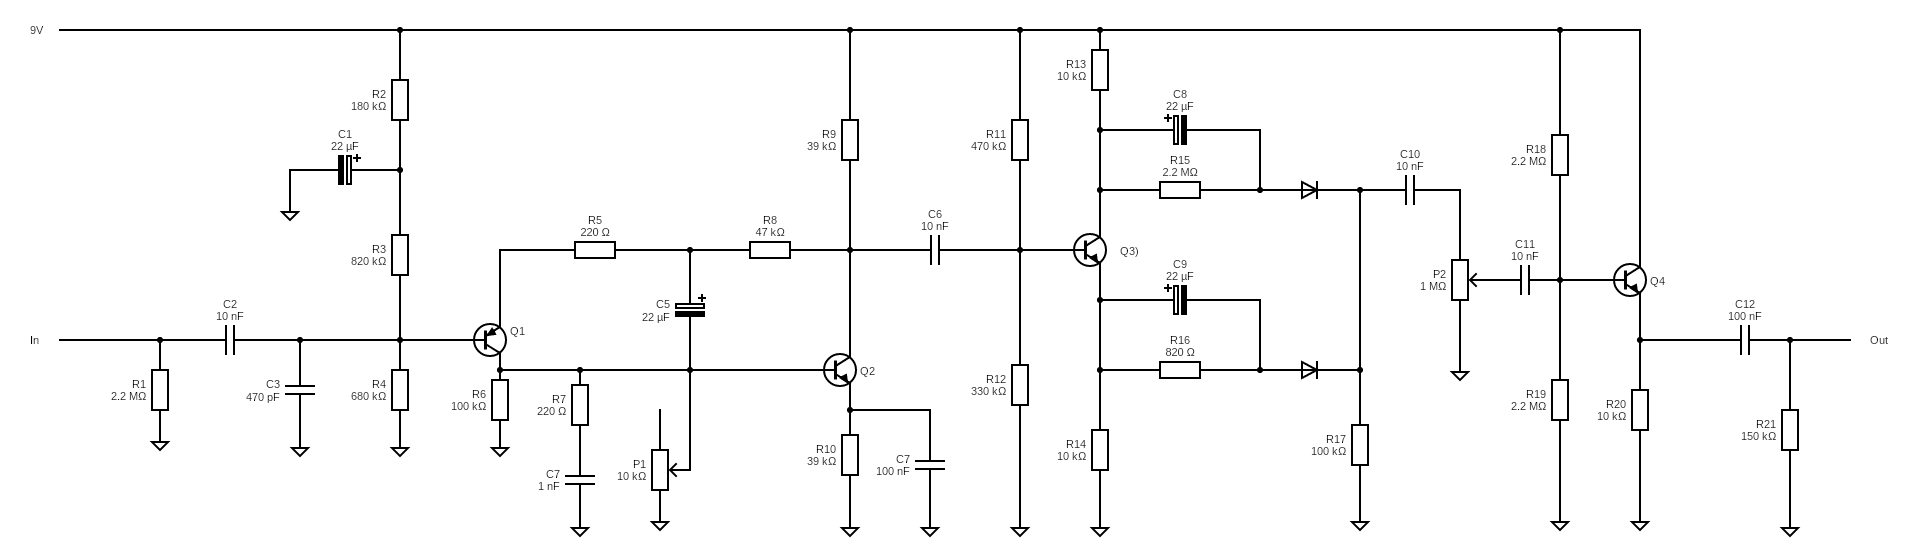
And here’s the bill of materials.
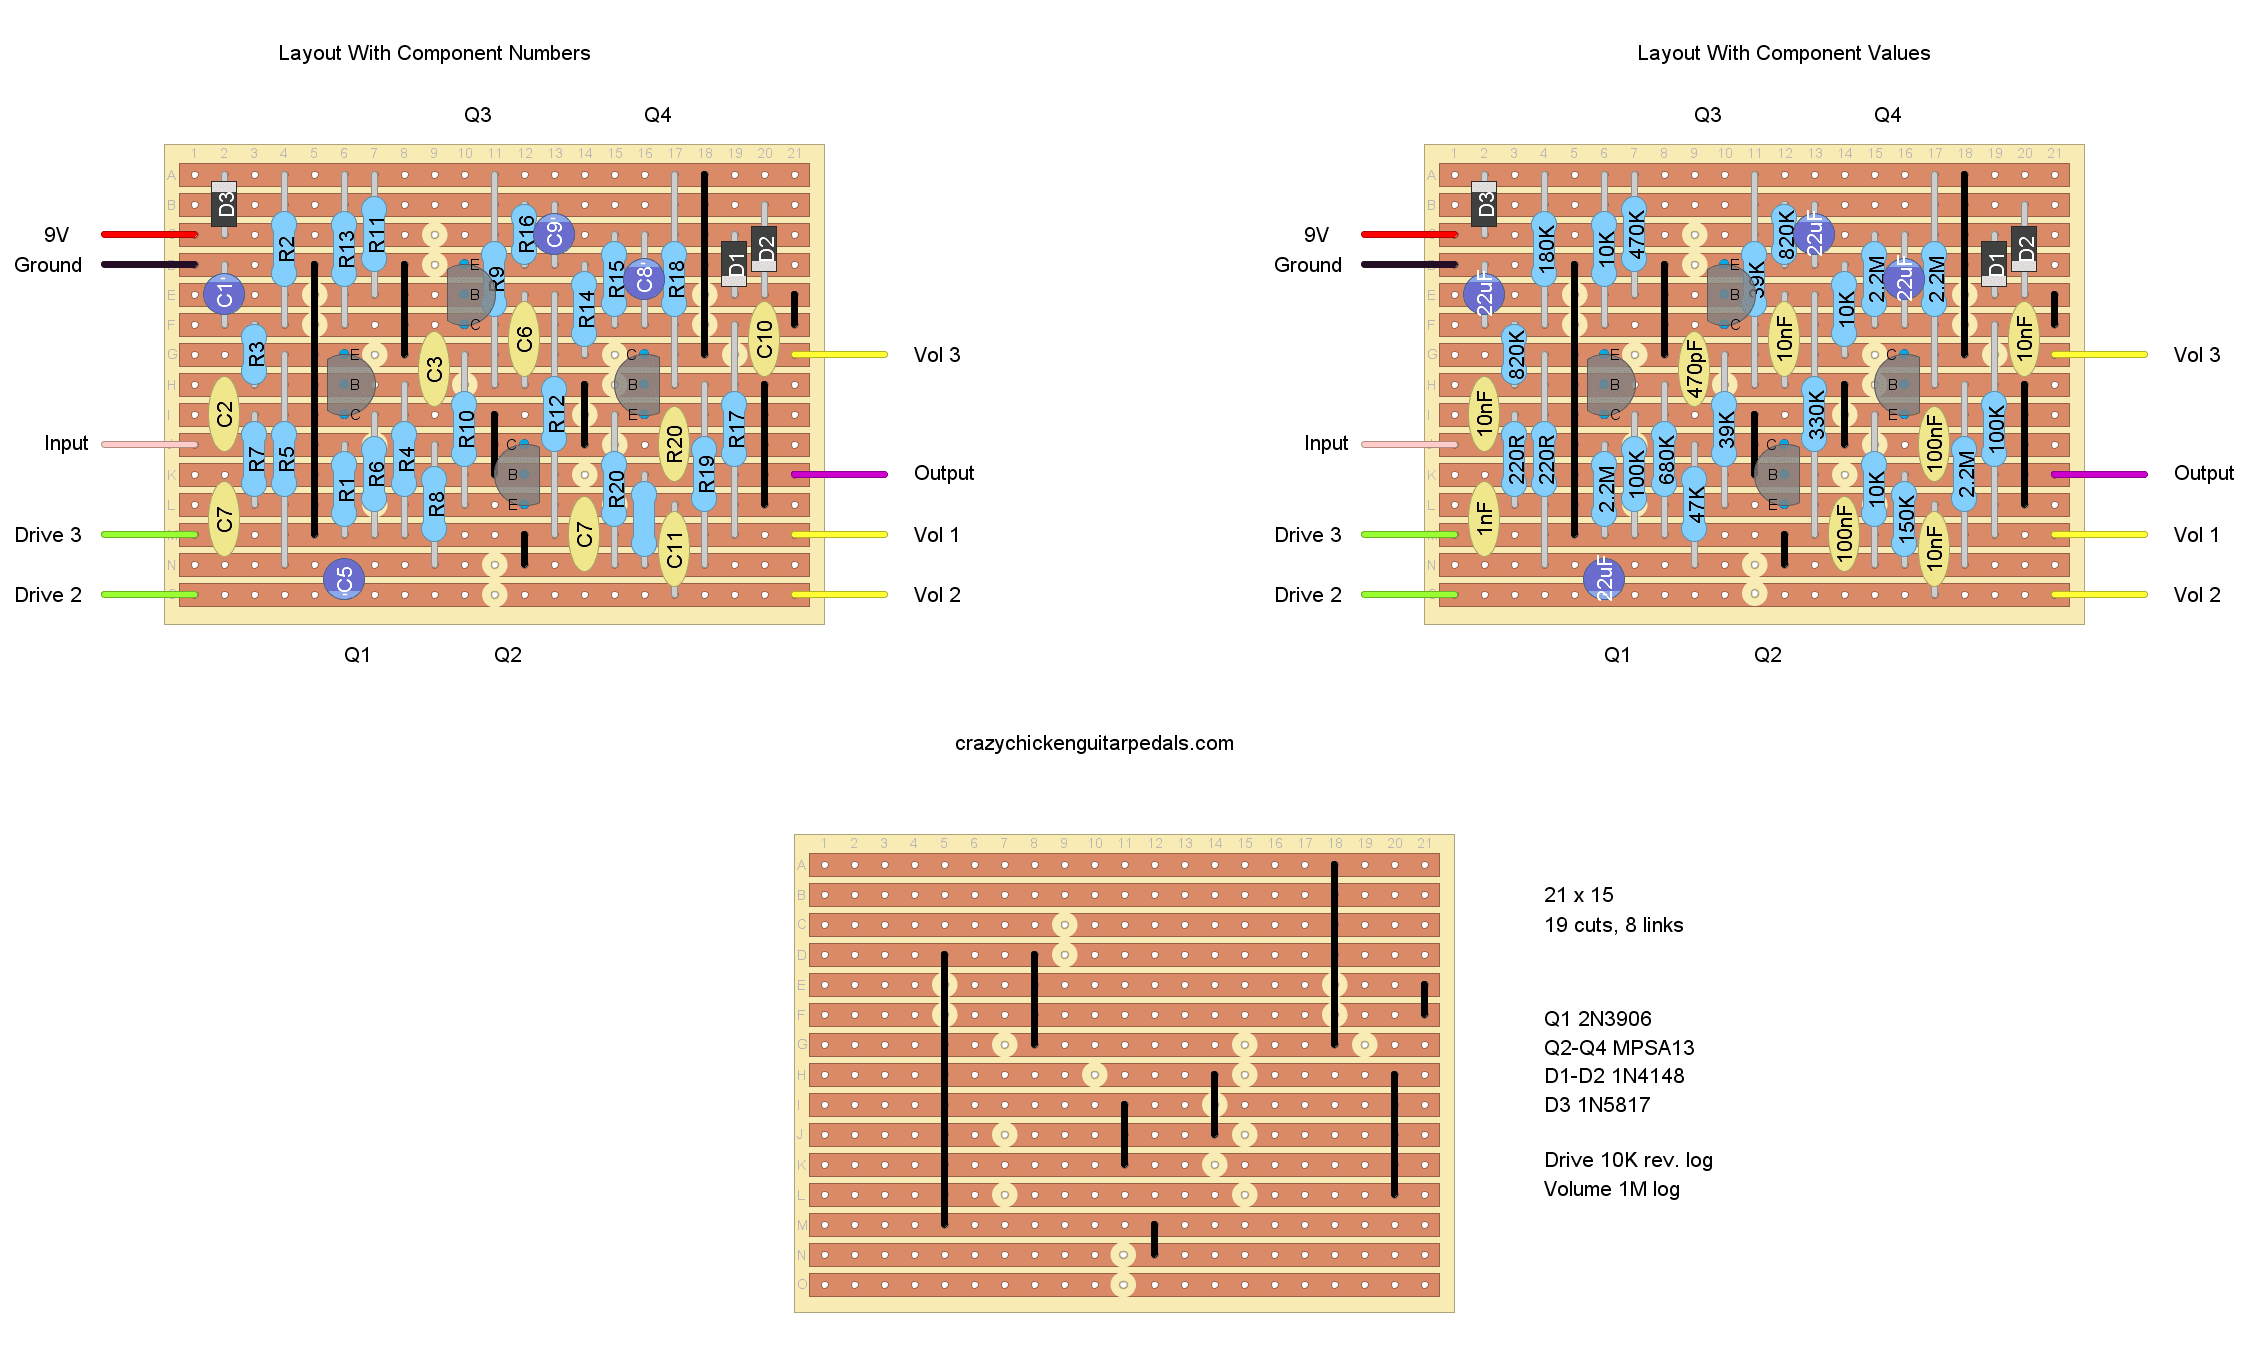
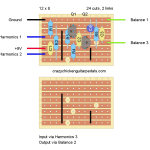
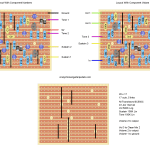
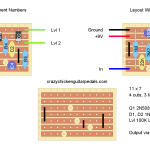
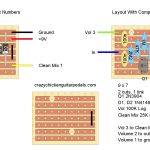
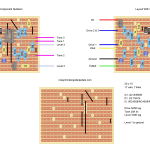
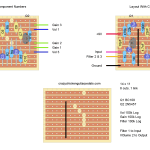
Roger Mayer Octavia Stripboard Layout
When I first saw this layout it seemed large and intimidating for some reason. I’ve built large guitar pedal circuits, like the Big Muff, so I don’t know why this one looked scary to me. It is a little bit more crowded than the Big Muff layout, but, of course, the board is smaller. All in all though, it wasn’t a hard one to put together.
As usual, I’ve provided a layout with component numbers on the left and a layout with component values on the right. If you’re keen to mod this thing, refer to the schematic above and go nuts.
You’ll also notice that there’s a diode (D3) here coming out of the power input that’s not on the schematic. I got this layout from Tag Board Effects, and I imagine he added it for voltage protection.
Click on the diagram to enlarge it.

My Experience Building Roger Mayer Octavia
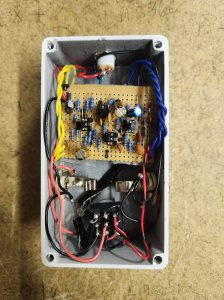 Even though I found the build a little intimidating at first, it turned into a pretty standard and cruisy one. There were a fair amount of cuts, and, on a board this big, it can be hard to navigate where they go.
Personally, I like to use the cuts and links as guides for the rest of the components. On a smaller board, of course it’s easier to find your way, but on a big blank board, until you get the cuts marked in and the links in place, it’s easy to get lost.
So that’s really my only advice with a board of this size: measure twice, cut once. Once the cuts are in place, use them as a guide and it’s not more difficult than a small board.
After building it, the pedal worked first time, which I was happy with. Again, with larger builds like this, I’m often worried about debugging the pedal because there’s just so much to check. Is it a component, is it a mistake on my part, is it something else?
So yeah, I’m glad I didn’t need to debug…
How Does The Roger Mayer Octavia Sound?
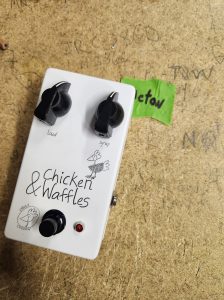 All in all, it sounds pretty rad!
Honestly, I was hoping for something a little beefier, but it is similar to a nice tight fuzz like you hear on a Tone Bender. I think I was expecting something bigger because I’ve mostly heard the Octavia in Jimi Hendrix’s music, but I also imagine he was running through more than just an Octavia.
With that, my guitar playing ability is far from Jimi’s and, if I’m being honest with myself, I don’t think my style really suits that sound of this pedal. I did play a little bit of Purple Haze with this thing and it sounded pretty cool, but again, it needed a bit more to really get Jimi’s tone. Some of it was needing other effects, but a lot of it was probably ability. Sure, the opening riff to Purple Haze isn’t a tough one, but someone like Hendrix or SRV, or any of the guitar greats, just have that ability to sound so so good regardless of what they’re doing. I think a part of me was hoping I’d plug the Octavia in and immediately sound like Jimi Hendrix. So of course I was disappointed.
But, setting aside my aspirations and hoping to make a box that easily makes me a better guitar player, it’s a great pedal. I just need to better understand how to use it, which takes a bit of practice.
Related posts:
 Escobedo Harmonic Jerculator On Stripboard
 Vox Tone Bender On Stripboard
 Catalinbread Karma Suture On Stripboard
 Colorsound One Knob Fuzz On Stripboard
 Electro-Harmonix Big Muff On Stripboard
 Lovepedal Champ On Stripboard
 Greer Amps Green Giant On Stripboard
 Ibanez Tube Screamer (TS808) On Stripboard
 Lumpy’s Tone Shop Lemon Drop On Stripboard
 Marshall Bluesbreaker On Stripboard