Here’s a fun and great sounding DIY guitar pedal build: the Karma Suture by Catalinbread. It looks like like this pedal is no longer in production, so if you want one, you’ll have to build it.
To be specific from the get go: this is the silicon version of the pedal; I went with the silicon version mostly because the transistors were going to be easier to get. Yes, there is a difference in sound between silicon and germanium transistors, and, for this pedal, it’s not a matter of just swapping the transistors out. So you’ll have to look else for the germanium build.
Fans of the Harmonic Percolator (or at leas the Harmonic Jerculator) may notice some similarities in the schematic for the Karma Suture. And that’s because the Karma Suture is based on the Harmonic Percolator. But it’s quite heavily modified.
Like the Harmonic Percolator, the Karma Suture uses NPN and PNP transistors and is an all around fairly unorthodox wiring that just somehow works. The Karma Suture, however, adds more to it though with a distortion stage through diode clipping; this can be adjusted with a potentiometer. This gives the ability to do a standard Harmonic Percolator style fuzz along with backing that up with some distortion (or not). Basically speaking, this pedal gives so many different adjustments, the sounds are almost limitless.
I quite enjoyed building the Karma Suture and adding it to my list of DIY guitar pedal builds.
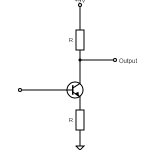
Catalinbread Karma Suture Wiring Schematic
As always, I’m presenting the wiring schematic for the pedal first. You’re more than welcome to skip ahead to the stripboard layout, but if you want to make some modifications or better understand what’s happening, the schematic can help you here.
Here’s the wiring diagram:
Click on the schematic to enlarge it.
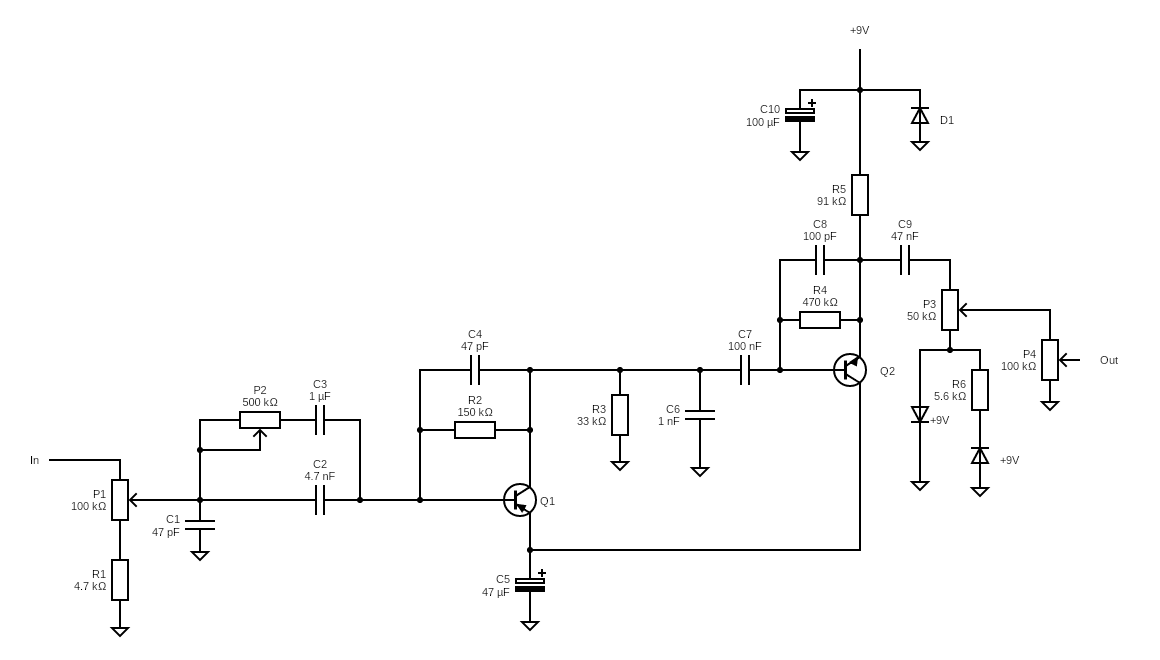
And here’s the bill of materials.
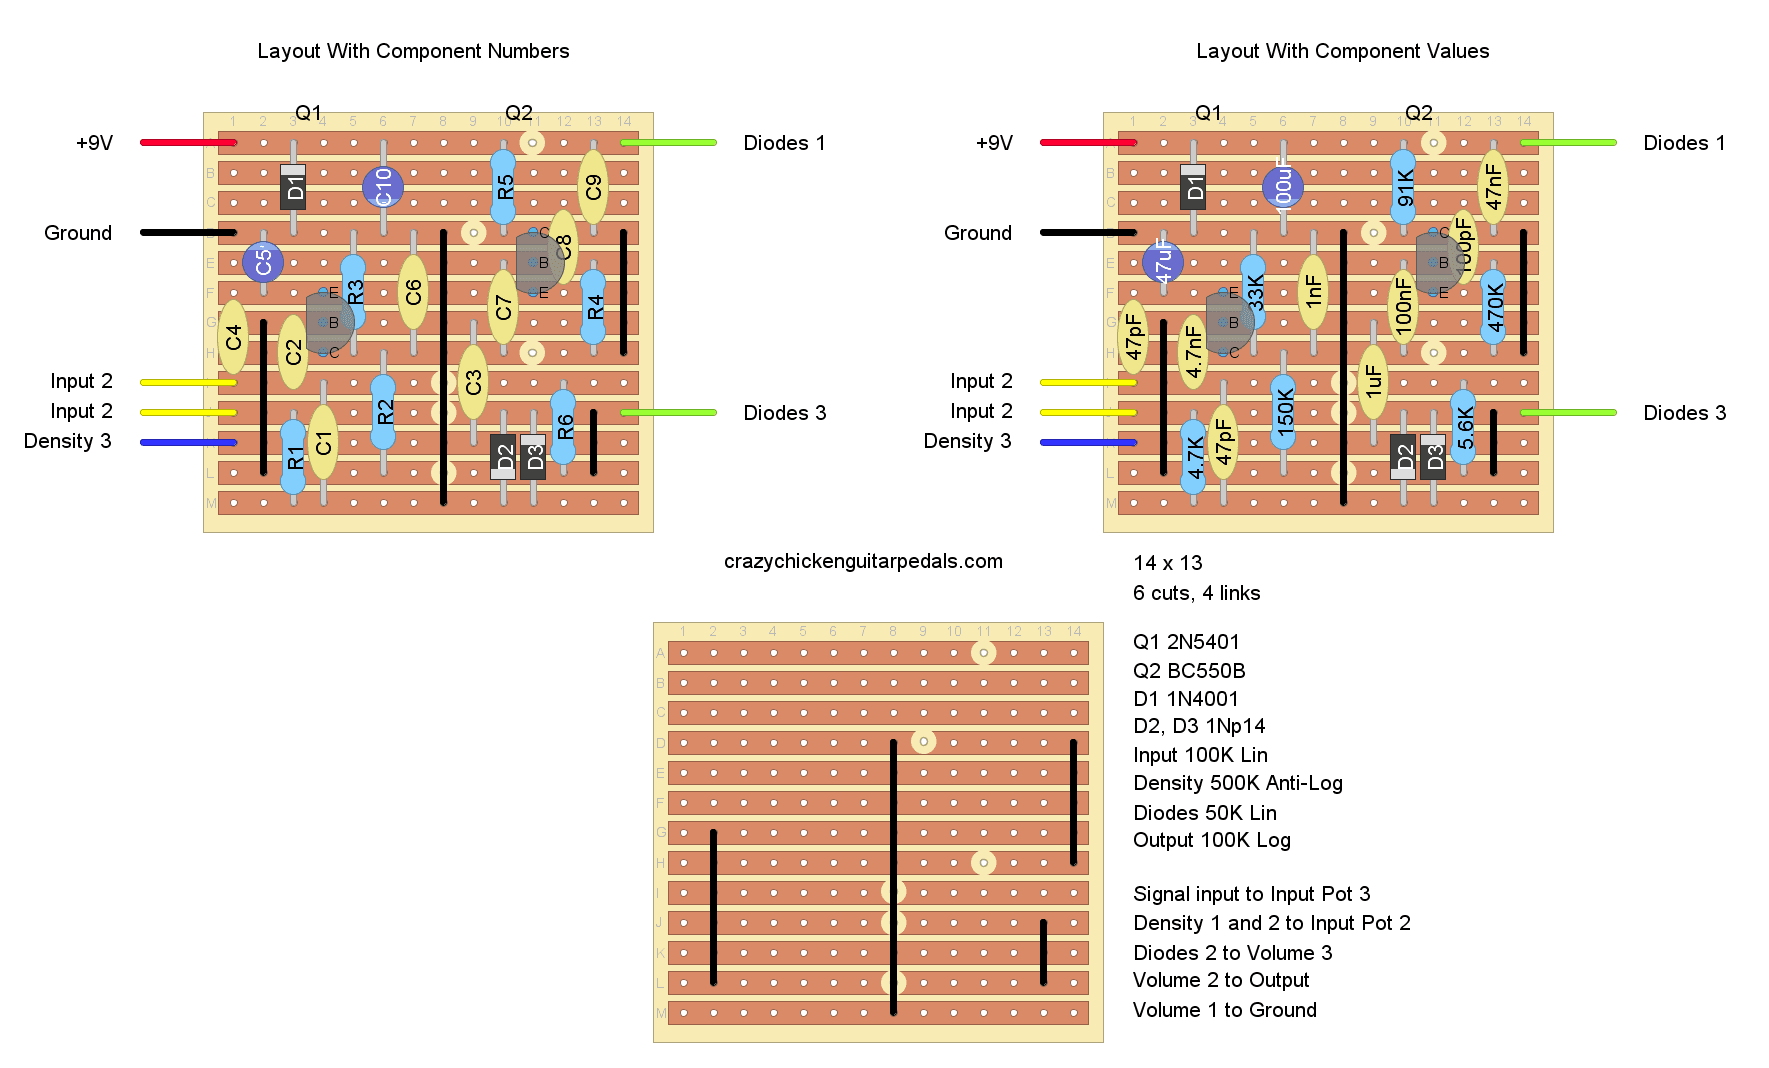
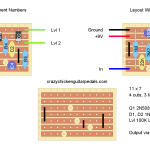
Catalinbread Karma Suture Stripboard Layout
I’ve slightly modified the stripboard layout provided by Tagboard Effects here. They always do a good job and I’m not going to reinvent the wheel.
The big thing to be aware of is that there’s quite a lot of wiring between different potentiometers. It’s not particularly difficult to do this, but it can get confusing. To add further confusion, one potentiometer is called “input,” which can be confused with the general input wire. I’ve tried to be clear, but just make sure you understand the potentiometer wiring.
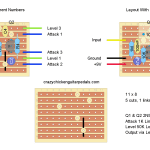
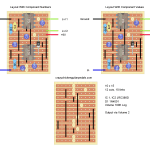
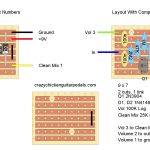
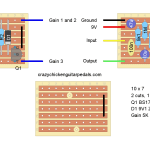
As always, I’ve provided the stripboard layout for this pedal with both the component numbers and with values. If you just want to build the thing, go for it with the values shown on the layout. If you want to change stuff up, you can compare the component number to the component number to the schematic above so you know what you’re changing.
Here’s the Karma Suture stripboard layout:
Click on the diagram to enlarge it.

My Experience Building The Catalinbread Karma Suture
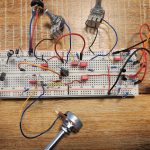
 As mentioned, the most complicated part of this build was the connections between the potentiometers, and that wasn’t too bad. You just need to remember to concentrate here. The connections between the different potentiometers did lead to a bit of spaghetti wires in the enclosure, but overall it’s still neat enough. I do like a neater build, but, at the end of the day, no one is going to see it anyway.
While this isn’t a build with only a few components, it’s also not the biggest build out there either. The stripboard isn’t too crowded, so populating it isn’t too tough. There are plenty of denser builds out there, and I’m sure there’s a more compact layout for this pedal, but compact isn’t always a good thing if it makes it too difficult to build.
With all of that, I wouldn’t put the Karma Suture into the category of easy DIY pedal builds, it’s not an advanced one, but not the first pedal you should be making if you’re new to the hobby. If you’re looking to up your skill level a little bit, this is likely a good project.
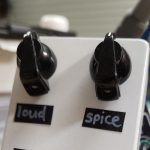
On that, this was actually a really cruisy build. It almost worked the first time when I tested it, but I managed to break some of the solder for one of the wires when I was getting it set up. 5 minutes later, that was fixed and it sounded great. I haven’t made a pedal with four knobs on it in a long time, and of course that makes things a little more crowded, but not too bad.
How Does The Catalinbread Karma Suture Sound?
Related posts:
 Escobedo Harmonic Jerculator On Stripboard
 Lovepedal Purple Plexi On Stripboard
 Vox Tone Bender On Stripboard
 EarthQuaker Devices Acapulco Gold On Stripboard
 Greer Amps Green Giant On Stripboard
 ZVEX Super Hard On On Stripboard
 Lovepedal Champ On Stripboard
 Building And Modding A Tube Screamer On A Breadboard
 What Is Gain (And How It’s Different From Volume)
 How Does A Drive, Gain, Or Distortion Knob Work?