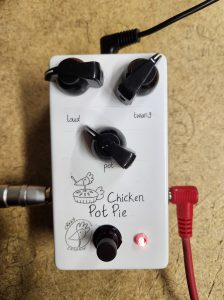
 I’ve been putting off writing this article because it’s kind of a big question. If you’ve spent any time poking around my site, you’ll know a lot of it is set up to try and help newbies to the marvelous hobby of DIY guitar pedals. It can be hard to know where and how to get started, and it can be just as hard to give a concise answer to how to get started.
On the one hand, if I give too concise and answer to how to get started at building guitar pedals, people will walk away with too many questions. On the other hand, no one wants to read a 5,000 word essay with my thoughts on the matter.
So, in this article, I’m trying to meet everything half way. This article is supposed to be a doorway for people who are interested in building DIY guitar pedals. From here you can scratch the surface, or you can follow the links to articles that go deeper on the topic.
I have a series of articles for my beginner’s guide to building guitar pedals, which vaguely follows the sections in this article, but you have to read each article. This article looks to be a summary version of my beginner’s guide!
So, let’s get started.
The Equipment And Tools You Need To Build Guitar Pedals At Home
I already have a longer article on the equipment and tools you need to make guitar pedals at home; if the list below isn’t extensive enough/isn’t explained enough, have a read of the longer article.
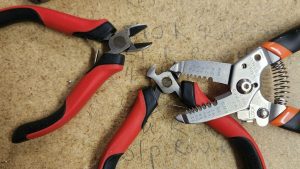 Here’s a quick list of the tools you’ll need to get started:
- Soldering iron
- 0.6mm lead free solder
- Blu Tack (to hold your board in place while you solder)
- Wire cutters
- Wire strippers
- Long nose pliers
- 22 gauge Solid core wire
- Drill and drill bits
That’s about it. There are other things that are nice to have, but you can likely do without them to start.
Decide Whether You Want To Try A PCB Kit First Or Go Straight To Stripboard
A printed circuit board (PCB) kit is a great way to get started because all you have to do is place components in pre-designated areas. However, PCB kits are limited in choice. Stripboard, on the other hand, allows you to build and modify pretty much any pedal; this site and others have plenty of guitar pedal stripboard layouts to choose from.
That being said, stripboard can be a little intimidating at first. Personally, I prefer building on stripboard because then I can build whatever I want, often to the original specs, but it can look scary at first! The article linked above explains what stripboard is and how to read the layouts; it may look confusing at first, but it’s actually quite easy!
If you are keen on trying to build guitar pedals on stripboard, check out my list of easy DIY guitar pedal builds. These easier builds tend to mostly be fuzz or boost pedals. Even if that’s not your sound, I encourage you to start with these as they only have a handful of components each. They may take a beginner a few hours to complete, but it’s fun!
Follow My Step By Step Guide On How To Build A Distortion Pedal
If you’re still overwhelmed by choice and you’re just saying “shut up, I just want to build something!” I have have a step by step guide on how to build a distortion pedal.
This guide goes through building a simple distortion pedal on stripboard and aims to be very thorough (perhaps a little bit too thorough) in order to eliminate any guesswork or questions.
I think this guide is a really good place to start. Follow it, and if you have any questions, leave a comment on the article; I’ll get back to you and even update the article to avoid confusion for others in the future.
Get Components For Your First Guitar Pedal Build
Whether you’ve decided to use a PCB kit or go with stripboard, you need components. I buy most of my components from Tayda. They have PCBs as well, but it looks like you need to purchase the components separately. Some guitar pedal PCB sites only sell the PCB while others will sell an entire kit that includes the PCB as well as the components you’ll need.
If you’re looking at buying components, understanding exactly what you need can be a bit intimidating. Below is a brief explanation of what you should get, with links to longer articles on the components if you have more questions:
- Resistors – the resistance values of what you need will be listed on the parts list. Resistors come in difference tolerances and wattages. You want 1/4W 1% Metal Film resistors.
- Capacitors – capacitors come in few flavours, unless specified otherwise, you should be fine with ceramic disc capacitors rates for 10-50 volts (the lower the voltage the better, as long as it’s over 10V). Some capacitors may be listed as polarised or electrolytic; in those cases, get an electrolytic capacitor rated for at least 10 volts.
- Diodes – the exact diode model number will be lists.
- Operational Amplifiers and Transistors – the exact transistor model will be listed
- Potentiometers – get pots that are lists as “PCB mount.” Other than that, the resistance required will be specified.
Get Building!
I wrote this article and created this site because, when I first started, I couldn’t find any single source that really directed me the right way. I didn’t know what I didn’t know, let alone was I aware where to look.
There’s a lot of information here and everywhere else, and I hope that anybody reading this isn’t intimidated by all of it! Start here and maybe with my step by step distortion pedal guide. If you love it (I’m sure you will!), you can get obsessed and go deeper from there.
Welcome to the club.
Related posts:
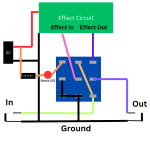 How To Wire A Guitar Pedal Foot Switch (3PDT)
 Gear You Need To Make Guitar Pedals
 Big Guide To Debugging DIY Guitar Pedals
 Why You Should Build Your Own Guitar Pedals
 How To Wire A Guitar Pedal DC Power Jack
 How To Wire Guitar Pedal Enclosures
 Is It Expensive To Make Your Own Guitar Pedals?
 How Do Guitar Pedal (And Guitar) Volume Knobs Work?
 What Do Guitar Pedals Do?
 How Does A Drive, Gain, Or Distortion Knob Work?
